Blog
How to set up your artwork for print
Preparing your artwork for printing is a crucial last step in the process. Get this stage right, and you’ll receive the finished products that you, your clients and customers will love. But, on the other hand, getting it wrong could be an expensive mistake.
Thankfully, the design experts at Bundle Packaging have put together this step-by-step guide on how to set up your artwork for print.
Download the correct template
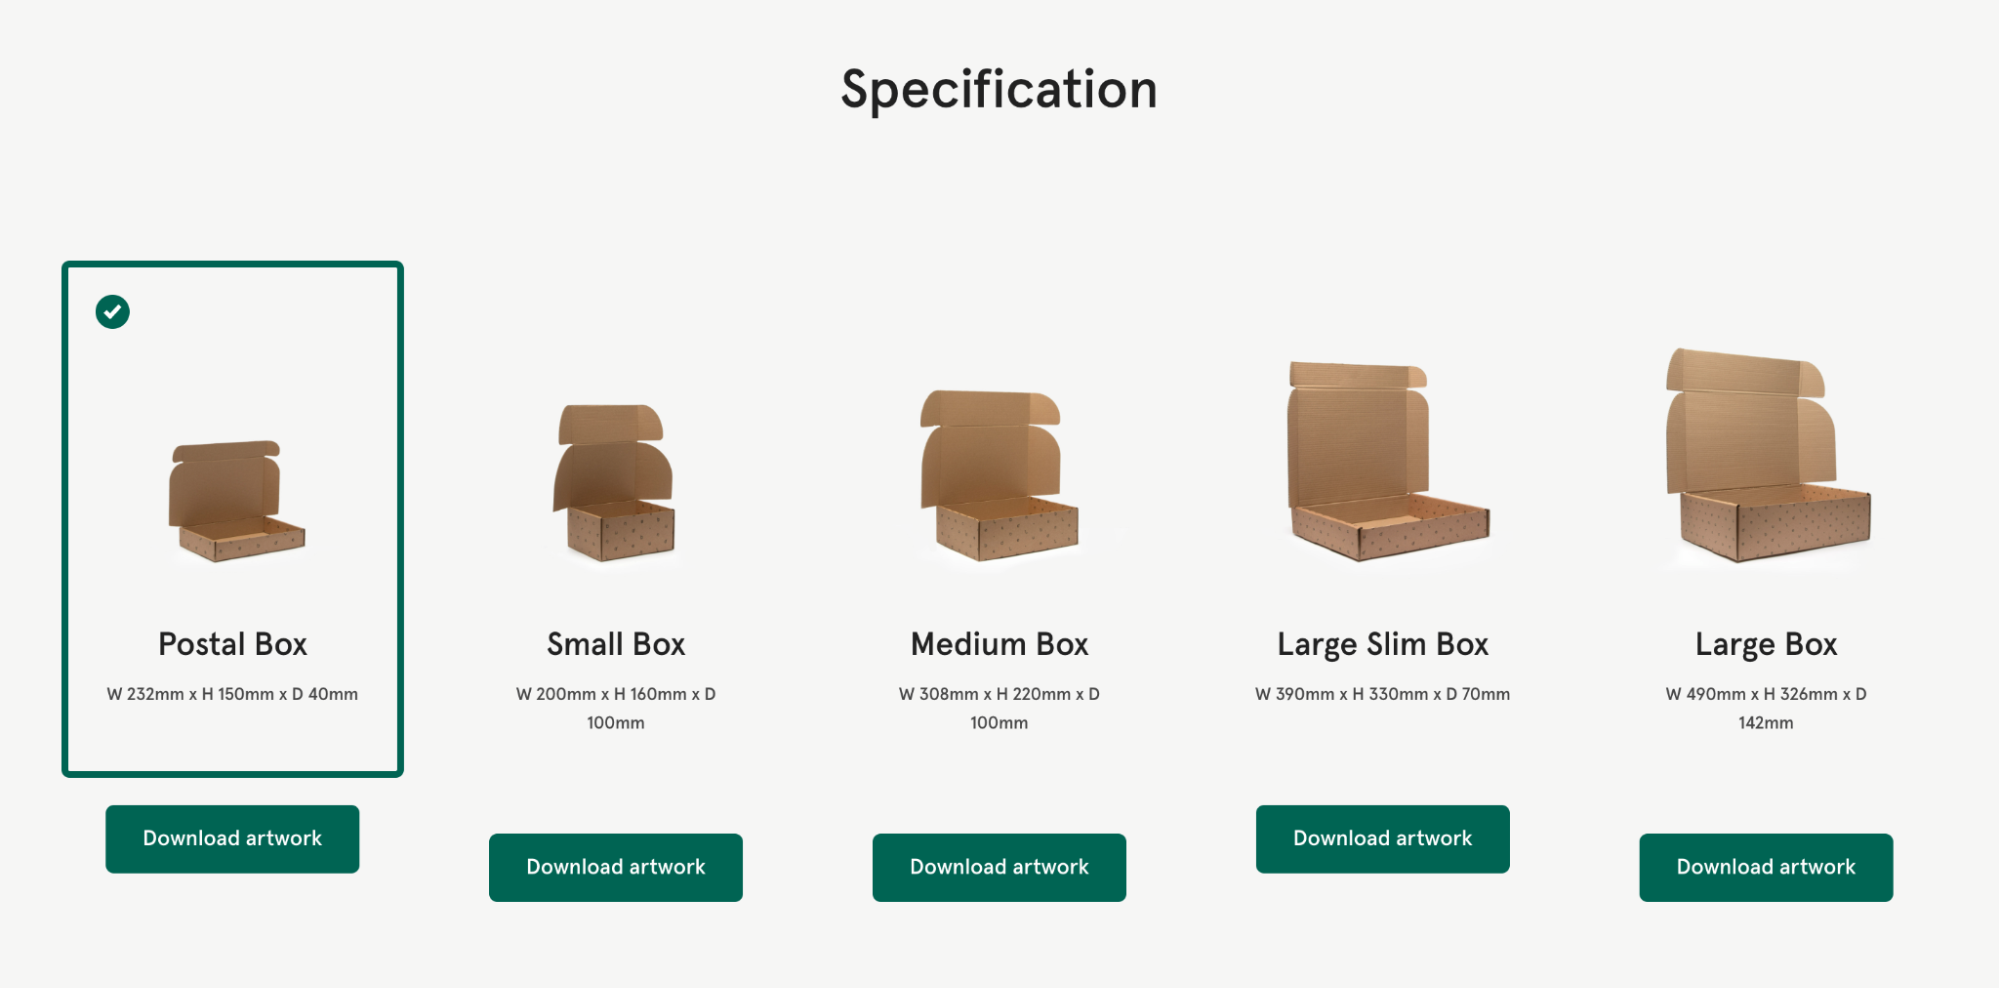
The first task is to download a design template specific to the product you wish to order. You’ll find information and specification sheets for all our products online.
These templates provide you with the parameters for the printable areas of our products. Basically, they make it simple for you to create compelling designs that will be perfectly produced when printed.
Open the artwork template in Adobe Illustrator and start designing!
You can use the templates in Adobe illustrator to develop your designs. They provide parameters for your design. Once you’ve downloaded your template(s) you can spend time developing your ideas for custom branded, 100% sustainable packaging.
Far from constraining your designs, templates enable you to get creative. For example, you can create your own boxes, mailers, tape, tissue, stickers and bags.
Here are some hints and tips to follow when creating your designs to ensure they’re ready to print:
- Make all colours CMYK
-
Use vector artwork for the best quality (sharpness) for illustrations/logos.
-
Image sre to be CMYK 300dpi
-
Use the bleed areas
-
Outline text
If you get stuck, use the step-by-step instructions!
You’ll find detailed information in our step-by-step help guide if you run into trouble. You can find our helpful guide on the left-hand side of the document.
You’ll be able to learn more about the structure of the document and how you can ensure that your finished designs are ready to print.
If you have a question that’s not answered in the document, you can always email us or give us a call, and we’d be happy to help.
How document layers work
Each document has four distinct layers. Each layer provides something essential to the print process. Here’s what each of the four layers on each document is and why they’re important.
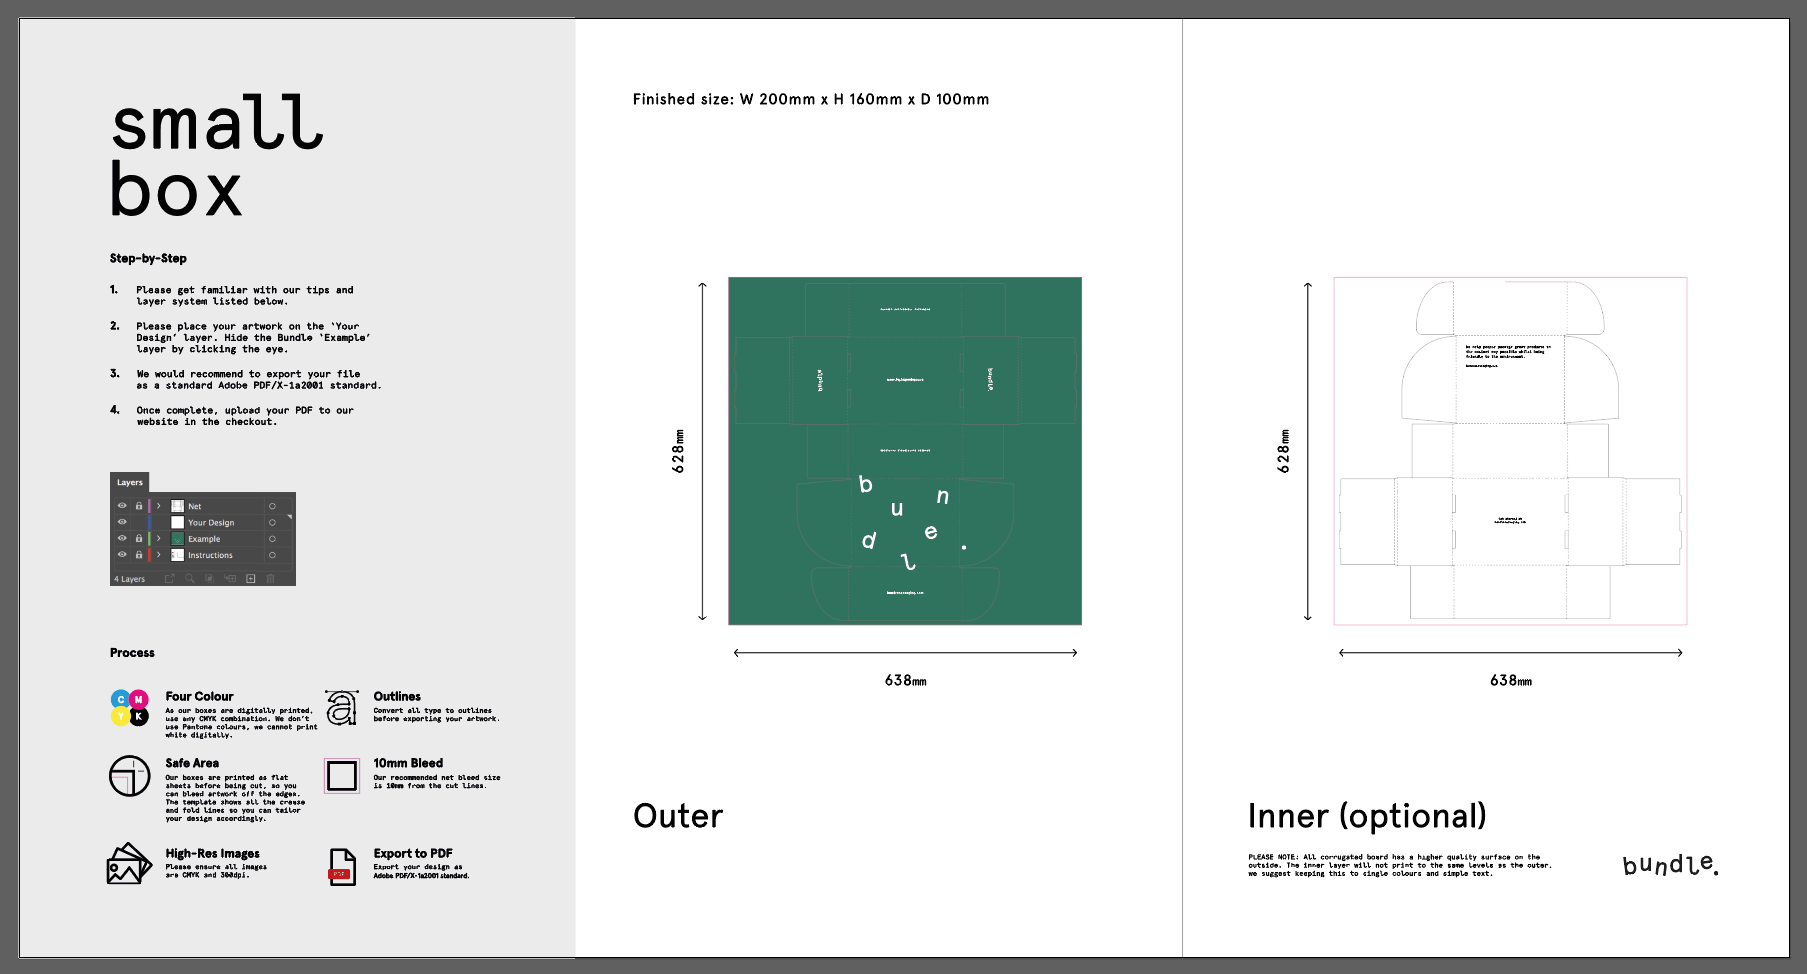
1. Net
The Net layer shows the cutting form of the product. Solid lines are where there will be a cut, and dotted lines are crease lines that will be folded.
Your artwork should sit inside this area. The pink outer line is the bleed area. Images, colours and text can run over into this area.
If you’ve selected a double-sided product, you’ll have an artwork area for the outer and inner. Each is marked, so you ensure you’re working on the right side.
2. Your design
The design layer is the only one you can work on. You position your artwork under the net later. Then, you can move the artwork around under the net to create a great finished product.
3. Example
The example layer provides designers with a representation of how your artwork sits in different areas of the printed product.
When you look at it, some parts of the artwork might look upside down when viewed flat. However, when cut and folded, the artwork will appear the right way around.
You can print out the net at any point and manually cut and fold it (following the outlines). This will enable you to see how your artwork will look when printed. (Depending on the size of your printer, your design may not be to scale.)
4. Instructions
As the name suggests, this layer provides essential information on the document. If you are unsure of the design parameters, check out the instructions layer first and our step-by-step advice guide.
Design finished?
Once your design has been finalised, you’ll need to export it as a PDF. Your fancy fresh PDF can now be uploaded to the Bundle Packaging website, where it will be reviewed by one of our experts.
Before sending your designs off to print, we’ll send you a PDF proof for you to review. You must take the time to review the proof as, after this, we enter production.
Get ready for your delivery!
Once you’ve signed off your finished artwork and sent it to print, we’ll get to work. Unfortunately, we can’t provide guaranteed shipping dates for items, but we will provide information on when you can expect your finished packaging materials to be delivered.
You’ll soon have your hands on your beautifully designed and impeccably produced packaging items.
Searching for the best sustainable packaging?
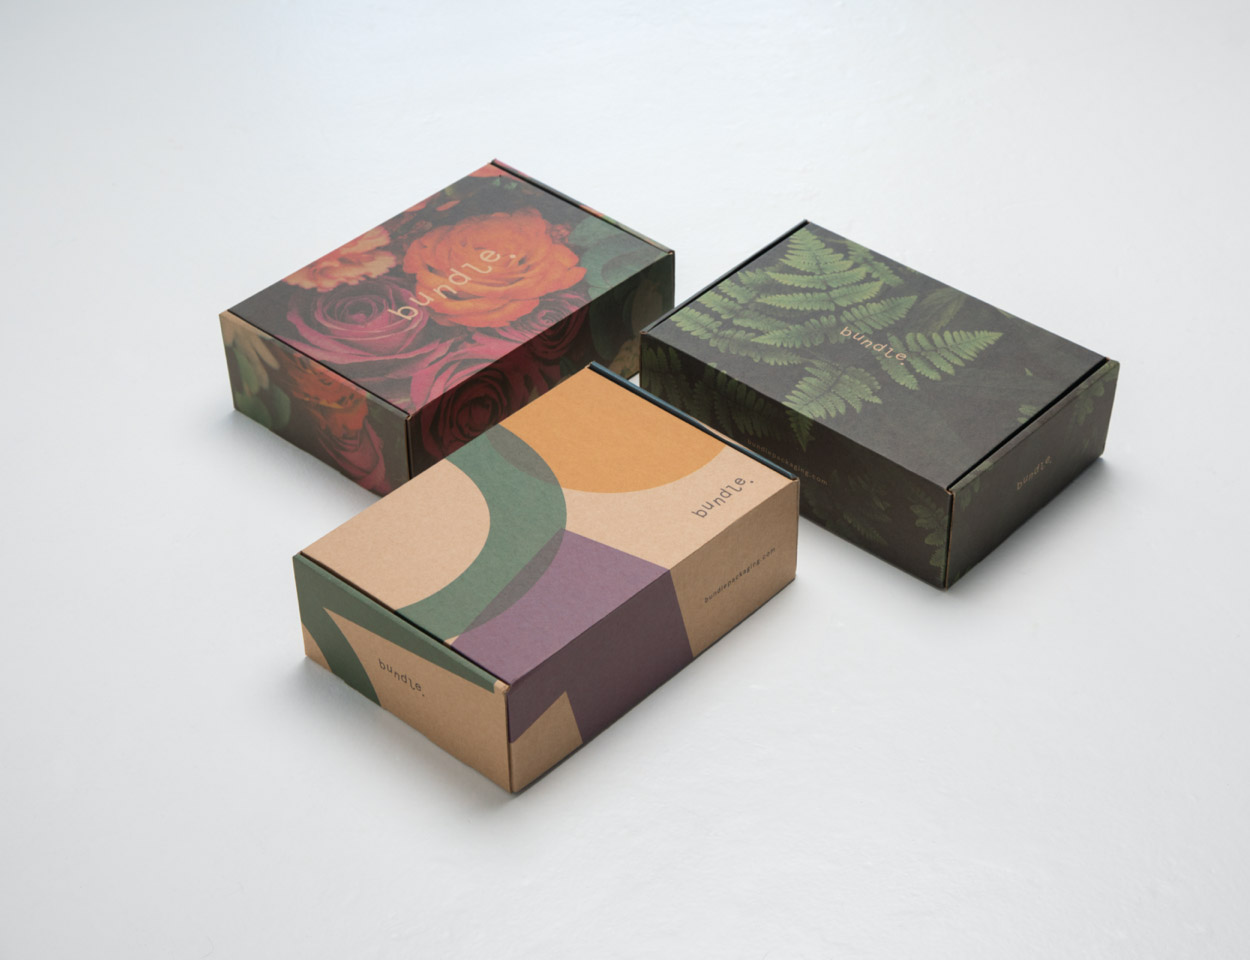
At bundle Packaging, we offer businesses of any size the chance to design and print their own 100% sustainable packaging. Using our templates, it’s easy to create exciting designs for boxes, mailers, tape, tissue, stickers and bags – all at prices others can’t match.
Check out our website and get designing today!

